Just another WordPress site

Tag: Linux

Useful CSF SSH Command Line Commands

Useful CSF SSH Command Line Commands (CSF Cheat Sheet)

This article covers some useful ConfigServer Firewall (CSF) SSH command line commands in a “cheat sheet” format.

Command Description Example
csf -e Enable CSF root@server[~]#csf -e
csf -x Disable CSF root@server[~]#csf -x
csf -s Start the firewall rules root@server[~]#csf -s
csf -f Flush/Stop firewall rules (note: lfd may restart csf)
root@server[~]#csf -f
csf -r Restart the firewall rules root@server[~]#csf -r
csf -a [IP.add.re.ss] [Optional comment] Allow an IP and add to /etc/csf/csf.allow
root@server[~]#csf -a 187.33.3.3 Home IP Address
csf -td [IP.add.re.ss] [Optional comment] Place an IP on the temporary deny list in /var/lib/csf/csf.tempban root@server[~]#csf -td 55.55.55.55 Odd traffic patterns
csf -tr [IP.add.re.ss] Remove an IP from the temporary IP ban or allow list.
root@server[~]#csf -tr 66.192.23.1
csf -tf Flush all IPs from the temporary IP entries
root@server[~]#csf -tf
csf -d [IP.add.re.ss] [Optional comment] Deny an IP and add to /etc/csf/csf.deny root@server[~]#csf -d 66.192.23.1 Blocked This Guy
csf -dr [IP.add.re.ss] Unblock an IP and remove from /etc/csf/csf.deny root@server[~]#csf -dr 66.192.23.1
csf -df Remove and unblock all entries in /etc/csf/csf.deny root@server[~]#csf -df
csf -g [IP.add.re.ss] Search the iptables and ip6tables rules for a match (e.g. IP, CIDR, Port Number) root@server[~]#csf -g 66.192.23.1
csf -t  Displays the current list of temporary allow and deny IP entries with their TTL and comments  root@server[~]#csf -t

Whitelisting an IP Address

In order to prevent specific IP from being blocked, even for a temporary deny, you need to list their IP address in the files csf.ignore and csf.allow. The first step is to enable IGNORE_ALLOW in csf.conf. The value for IGNORE_ALLOW will appear as “0”, you will need to adjust it to “1” and restart csf and lfd.

This will allow lfd to reference csf.ignore. If you add an IP address to csf.ignore, the IP address will no longer be checked by lfd and failed login attempts will not trigger temporary denies.

Install Cyberpanel on Linux

Requirements

  • Server with a fresh install of Centos 7.x (Not recommended for new installs), Centos 8.x, Ubuntu 18.04, Ubuntu 20.04, AlmaLinux 8, Ubuntu 22.04
  • Python 3.x
  • 1024MB RAM, or higher
  • 10GB Disk Space

CyberPanel vs CyberPanel Ent

CyberPanel is 100% identical in both versions. The only difference is which web server is running in the back-end.

  1. CyberPanel comes with OpenLiteSpeed and is completely free for an unlimited number of domains and worker processes.
  2. CyberPanel Ent comes with LiteSpeed Web Server Enterprise and it is free for 1 domain. If you need more than 1 domain, you can view our pricing page 1.5k. The CyberPanel license includes the price of your LiteSpeed Enterprise license.

To learn more about the differences between OpenLiteSpeed and LiteSpeed Web Server Enterprise, please see this comprehensive comparison 434.


Installing CyberPanel

Step 1: Connect to your server via SSH

The installation of CyberPanel is quite simple. First, log into your server via SSH as the root user (sudo will not work). You can get the login details from your web host.

Step 2: Update packages

For Ubuntu: sudo apt update && sudo apt upgrade -y
For CentOS/Alma/Rocky:

sudo yum check-update
sudo yum update

Step 2: Run the installation script

Run the following command. It will initiate the automated installation script, which will prompt you for a few decisions about which version of LiteSpeed and which add-ons you would like to install.

sh <(curl https://cyberpanel.net/install.sh || wget -O - https://cyberpanel.net/install.sh)

If, for some reason, you are not able to log in as root, you can use this command

sudo su - -c "sh <(curl https://cyberpanel.net/install.sh || wget -O - https://cyberpanel.net/install.sh)"

Step 3: Select the version of LiteSpeed that you would like to use

Select which version of LiteSpeed to install. If you select LiteSpeed Enterprise, please ensure that you have obtained a license key first. It is free for 1 domain, but you still need to obtain the key. Visit the pricing table 1.5k to decide your desired plan.

CyberPanel Installer v2.1.2

RAM check : 184/981MB (18.76%)

Disk check : 7/30GB (27%) (Minimal 10GB free space)

1. Install CyberPanel with OpenLiteSpeed.

2. Install Cyberpanel with LiteSpeed Enterprise.

3. Exit.


  Please enter the number[1-3]:

If you selected LiteSpeed Enterprise, you will see the following prompt. Enter your serial number

If you do not have any license, you can also use trial license (if server has not used trial license before), type TRIAL

Please input your serial number for LiteSpeed WebServer Enterprise:

Step 4: Select options and add-ons

You will be presented with a series of prompts for different options and add-ons that are available.

Full Service (default Y):

Remote MySQL (default N):

  • Allow for your Database to be installed on a remote server

CyberPanel Version (default Latest Version):

  • You can choose to install a previous version of CyberPanel, or press Enter to install the latest

Password (default “1234567”):

  • It is recommended that you use “s” to set your own strong password

Memcached 54 (default Y):

  • Distributed memory object caching system

Redis 24 (default Y):

  • In-memory data structure store, used as a database, cache, and message broke

Watchdog 69 (default Yes):

  • Kernel watchdog is used to monitor if a system is running. It is supposed to automatically reboot hanged systems due to unrecoverable software errors

Step 5: Installation

The installation process will proceed automatically. It will take 5-10 minutes, depending on the speed of your server.

Step 6: Finalize Installation

At the end of the installation process, you will be presented with the following screen which contains important information about your configuation. Select and copy it to a safe location for future reference.

###################################################################
                CyberPanel Successfully Installed

                Current Disk usage : 7/30GB (26%)

                Current RAM  usage : 313/981MB (31.91%)

                Installation time  : 0 hrs 11 min 0 sec

                Visit: https://<your server's IP address>:8090
                Panel username: admin
                Panel password: <the password you set during installation>
                Visit: <your server's IP address>:7080
                WebAdmin console username: admin
                WebAdmin console password: TSXMwny4zVeDg37K

                Visit: https://<your server's IP address>:8090/rainloop/?admin
                Rainloop Admin username: admin
                Rainloop Admin password: gQKFWm9O3nr7Xn

             Run cyberpanel help to get FAQ info
             Run cyberpanel upgrade to upgrade it to latest version.
             Run cyberpanel utility to access some handy tools .

              Website : https://www.cyberpanel.net
              Forums  : https://forums.cyberpanel.net
              Wikipage: https://docs.cyberpanel.net
              Docs    : https://cyberpanel.net/docs/

            Enjoy your accelerated Internet by
                CyberPanel & OpenLiteSpeed
###################################################################
If your provider has a network-level firewall
Please make sure you have opened following port for both in/out:
TCP: 8090 for CyberPanel
TCP: 80, TCP: 443 and UDP: 443 for webserver
TCP: 21 and TCP: 40110-40210 for FTP
TCP: 25, TCP: 587, TCP: 465, TCP: 110, TCP: 143 and TCP: 993 for mail service
TCP: 53 and UDP: 53 for DNS service
Your provider seems blocked port 25 , E-mail sending may not work properly.

Step 7: Restart Server

Would you like to restart your server now? [y/N]:

Enter “y” to restart. Or enter “reboot” later after you have performed other desired operations.

Step 8: Access CyberPanel

After the successful installation you can access CyberPanel using the details below (make sure to change):

URL: https://<Your Server's IP Address>:8090 
Username: admin
Password: <the password you set during installation>

Troubleshooting

503 Error After Install

If you get a 503 error after installing CyberPanel, you can do one of the following things.

1. Check LSCPD Status.

systemctl status lscpd

If LSCPD is not running, start LSCPD using:

systemctl start lscpd

2. Manually set up virtualevn

source /usr/local/CyberCP/bin/activate
pip install --ignore-installed -r /usr/local/CyberCP/requirments.txt
deactivate
virtualenv --system-site-packages /usr/local/CyberCP
systemctl restart lscpd

3. Install Logs

If you are still having issues after these steps, you can try to find errors in the install logs, they are located at:

/var/log/installLogs.txt

Uninstall Plesk for Linux

How to uninstall Plesk for Linux


Applicable to:

  • Plesk for Linux

Question

How to uninstall Plesk for Linux?

Answer

Warning: After Plesk uninstallation, some system services may stop working due to their close integration with Plesk. Before removing Plesk for Linux, it is recommended to create a server snapshot to have a system restore point.

Note: Due to a Plesk Installer bug with ID PI-498, it is not possible to remove Plesk installed on Debian/Ubuntu-based distributions:

– Debian 10
– Debian 9
– Debian 8
– Ubuntu 20.04
– Ubuntu 18.04
– Ubuntu 16.04

As a workaround, it is recommend to redeploy a server from scratch.

To remove Plesk from CentOS/RHEL-based distributions, follow these steps:

  1. Connect to a Plesk server via SSH.
  2. Run the following command to remove Plesk and all its components:
  3. #plesk installer –remove-everything

Download MariaDB Server

Download MariaDB Server

MariaDB Server is one of the world’s most popular open source relational databases and is available in the standard repositories of all major Linux distributions. Look for the package mariadb-server using the package manager of your operating system. Alternatively you can use the following resources:

MariaDB Server 11.0 brings many significant improvements to the query optimizer! Try it out and please let us know of your experience. We aim to incorporate all the feedback we receive.
You can read more about the optimizer improvements straight from the main author at Monty Says blog post!


MariaDB Server
MariaDB Server Repositories
Connectors
MariaDB Foundation provides packages for MariaDB versions newer than the version provided by the distribution only.

Version 10.6

Here are the commands to run to import the MariaDB repository key on your Ubuntu system:

sudo apt-get install apt-transport-https curl
sudo mkdir -p /etc/apt/keyrings
sudo curl -o /etc/apt/keyrings/mariadb-keyring.pgp 'https://mariadb.org/mariadb_release_signing_key.pgp'

Once the key is imported, copy and paste the following into a file under /etc/apt/sources.list.d (for instance /etc/apt/sources.list.d/mariadb.sources):

# MariaDB 10.6 repository list - created 2023-07-13 06:43 UTC
# https://mariadb.org/download/
X-Repolib-Name: MariaDB
Types: deb
# deb.mariadb.org is a dynamic mirror if your preferred mirror goes offline. See https://mariadb.org/mirrorbits/ for details.
# URIs: https://deb.mariadb.org/10.6/ubuntu
URIs: https://ftp.heanet.ie/mirrors/mariadb/repo/10.6/ubuntu
Suites: jammy
Components: main main/debug
Signed-By: /etc/apt/keyrings/mariadb-keyring.pgp

You can now install MariaDB 10.6 from the MariaDB repository with:

sudo apt-get update
sudo apt-get install mariadb-server

Debug symbol packages, those that end in a ‘-dbgsym‘ suffix, are harmless to install. They are typically used to resolve stack traces and provide detail of perf recordings. They do not change the running behaviour of MariaDB. If in doubt, omit from installation.

If you need source packages, replace Types: deb with Types: deb deb-src in the /etc/apt/sources.list.d/mariadb.sources file. Then, you can obtain the mariadb source after installing dpkg-dev package, with apt-get source mariadb-server.

If you prefer to use the old “one-line-style” APT format, create the file /etc/apt/sources.list.d/mariadb.list with the following:

# MariaDB 10.6 repository list - created 2023-07-13 06:43 UTC
# https://mariadb.org/download/
# deb.mariadb.org is a dynamic mirror if your preferred mirror goes offline. See https://mariadb.org/mirrorbits/ for details.
# deb [signed-by=/etc/apt/keyrings/mariadb-keyring.pgp] https://deb.mariadb.org/10.6/ubuntu jammy main
deb [signed-by=/etc/apt/keyrings/mariadb-keyring.pgp] https://ftp.heanet.ie/mirrors/mariadb/repo/10.6/ubuntu jammy main
# deb-src [signed-by=/etc/apt/keyrings/mariadb-keyring.pgp] https://ftp.heanet.ie/mirrors/mariadb/repo/10.6/ubuntu jammy main

See Installing MariaDB packages for more information

Distribution

CentOS 7

Version 10.6

Here is your custom MariaDB DNF/YUM repository entry for CentOS. Copy and paste it into a file under /etc/yum.repos.d (we suggest naming the file MariaDB.repo or something similar).

# MariaDB 10.6 CentOS repository list - created 2023-07-13 06:44 UTC
# https://mariadb.org/download/
[mariadb]
name = MariaDB
# rpm.mariadb.org is a dynamic mirror if your preferred mirror goes offline. See https://mariadb.org/mirrorbits/ for details.
# baseurl = https://rpm.mariadb.org/10.6/centos/$releasever/$basearch
baseurl = https://ftp.heanet.ie/mirrors/mariadb/yum/10.6/centos/$releasever/$basearch
module_hotfixes = 1
# gpgkey = https://rpm.mariadb.org/RPM-GPG-KEY-MariaDB
gpgkey = https://ftp.heanet.ie/mirrors/mariadb/yum/RPM-GPG-KEY-MariaDB
gpgcheck = 1

EPEL repository may be required to satisfy the pv dependency of galera.

After the file is in place, install and start MariaDB with:

sudo yum install MariaDB-server MariaDB-client

If you haven’t already accepted the MariaDB GPG key, you will be prompted to do so during the install. See Installing MariaDB with yum for detailed information. Note the GPG was changed in January 2023 with more secure key. For more details see our blog article New GPG Release Key for RPMs.

Debian 11 (Bullseye)

Version 10.6

Here are the commands to run to import the MariaDB repository key on your Debian system:

sudo apt-get install apt-transport-https curl
sudo mkdir -p /etc/apt/keyrings
sudo curl -o /etc/apt/keyrings/mariadb-keyring.pgp 'https://mariadb.org/mariadb_release_signing_key.pgp'

Once the key is imported, copy and paste the following into a file under /etc/apt/sources.list.d (for instance /etc/apt/sources.list.d/mariadb.sources):

# MariaDB 10.6 repository list - created 2023-07-13 06:49 UTC
# https://mariadb.org/download/
X-Repolib-Name: MariaDB
Types: deb
# deb.mariadb.org is a dynamic mirror if your preferred mirror goes offline. See https://mariadb.org/mirrorbits/ for details.
# URIs: https://deb.mariadb.org/10.6/debian
URIs: https://ftp.heanet.ie/mirrors/mariadb/repo/10.6/debian
Suites: bullseye
Components: main
Signed-By: /etc/apt/keyrings/mariadb-keyring.pgp

You can now install MariaDB 10.6 from the MariaDB repository with:

sudo apt-get update
sudo apt-get install mariadb-server

Debug symbol packages, those that end in a ‘-dbgsym‘ suffix, are harmless to install. They are typically used to resolve stack traces and provide detail of perf recordings. They do not change the running behaviour of MariaDB. If in doubt, omit from installation.

If you need source packages, replace Types: deb with Types: deb deb-src in the /etc/apt/sources.list.d/mariadb.sources file. Then, you can obtain the mariadb source after installing dpkg-dev package, with apt-get source mariadb-server.

If you prefer to use the old “one-line-style” APT format, create the file /etc/apt/sources.list.d/mariadb.list with the following:

# MariaDB 10.6 repository list - created 2023-07-13 06:49 UTC
# https://mariadb.org/download/
# deb.mariadb.org is a dynamic mirror if your preferred mirror goes offline. See https://mariadb.org/mirrorbits/ for details.
# deb [signed-by=/etc/apt/keyrings/mariadb-keyring.pgp] https://deb.mariadb.org/10.6/debian bullseye main
deb [signed-by=/etc/apt/keyrings/mariadb-keyring.pgp] https://ftp.heanet.ie/mirrors/mariadb/repo/10.6/debian bullseye main
# deb-src [signed-by=/etc/apt/keyrings/mariadb-keyring.pgp] https://ftp.he


How to Install FFmpeg on Linux, macOS, and Windows

How to Install FFmpeg on Linux, macOS, and Windows

FFmpeg is a cross-platform application that manages various types of multimedia files. The tool contains a set of shared audio and video libraries such as libavformat, libavutil, and libavcodec.

Furthermore, it decodes, encodes, mux, demux, streams, filters, plays, and transcodes media files. When converting video and audio files using FFmpeg, the tool will auto-detect the input and output formats.

FFmpeg is available as a command-line tool and supports different operating systems. In this article, we will explain how to install FFmpeg on Linux, macOS, and Windows.

If you want to install FFmpeg on your Linux VPS, connect to your machine via SSH before proceeding further.

How to Install FFmpeg on Linux

In this section, we will explain how to set up FFmpeg on popular Linux distributions like Ubuntu, Debian, CentOS, Fedora, and RHEL.

Installing FFmpeg on Ubuntu

There are two methods to install FFmpeg on Ubuntu – via the Personal Package Archives (PPA) and the default repository. The former contains a collection of software managed by the Ubuntu community and works best on Ubuntu 18.04 and older versions.

However, the installation must be done via the default repository if your machine runs Ubuntu 20.04 or 22.04.

Ubuntu 18.04

Here’s how to install FFmpeg via the PPA:

  1. Open the Terminal and log in as a root user.
  2. Install the software-properties-common package. This will allow you to manage the repositories you install the application from:
sudo apt-get install software-properties-common
  1. Once done, add mc3man PPA by adding the following command:
sudo add-apt-repository ppa:mc3man/trusty-media
  1. After the PPA is installed on the system, update the repository by running these commands consecutively:
sudo apt-get update
sudo apt-get dist-upgrade
  1. Next, install FFmpeg by typing in the command below:
sudo apt-get install ffmpeg

Ubuntu 20.04

Follow these steps to install FFmpeg via the default repository:

  1. Open the Terminal and access it via a root user.
  2. Update the system and packages installed by running both commands consecutively:
sudo apt update
sudo apt upgrade
  1. Insert the command below to install the FFmpeg application:
sudo apt install ffmpeg

Installing FFmpeg on Debian

There are two ways to install FFmpeg on Debian – via the default and multimedia repositories.

The former method serves Debian 9 and newer versions, while the latter applies to Debian 8 and older versions.

Debian 9

Here’s how to install FFmpeg using the default repository:

  1. Open the Terminal and log in via a root user.
  2. Update the package list and system by running both commands consecutively:
sudo apt update
sudo apt upgrade
  1. Next, install FFmpeg by adding the command below:
sudo apt install ffmpeg

Debian 8

FFmpeg is unavailable in the official Debian 8 or older repository. Therefore, users must add the Debian multimedia repository to install the codex by editing the sources.list file that contains the list of repositories the APT uses.

Follow these steps to install FFmpeg using the multimedia repository:

  1. Launch the Terminal and log in as a root user.
  2. Next, open the source.list file by typing in the following command. Use an editor such as nano or vi:
sudo vi /etc/apt/source.list
  1. Press I to enter Insert mode and start editing.
  2. Add the following lines at the end of the file:
# deb-multimedia
deb http://www.deb-multimedia.org jessie main non-free
deb-src http://www.deb-multimedia.org jessie main non-free
# jessie-backports
deb http://httpredir.debian.org/debian/ jessie-backports main
  1. Save the file by pressing ESC and close the file by pressing : (colon) and q!
  2. Finally, update the system by typing in the command below:
sudo apt update
  1. Insert this command to install the deb-multimedia-keyring package:
sudo apt install deb-multimedia-keyring
  1. Update the system once again to ensure the changes were saved by running the command below:
sudo apt update
  1. Once finished, install the FFmpeg package by typing in the command below:
sudo apt install ffmpeg

Installing FFmpeg on CentOS, Fedora, and RHEL

FFmpeg package is not available in the official repository of CentOS, Fedora, and RHEL. Therefore, users need to install it using an additional repository.

CentOS 7

Here’s how to install FFmpeg on CentOS 7 using the Nux Dextop repository:

  1. Open the Terminal and log in as a root user.
  2. Install the EPEL repository by typing in this command:
sudo yum install epel-release
  1. Update the system and packages by running the following command:
sudo yum update
  1. Use these commands to install the Nux Dextop repository:
sudo rpm --import http://li.nux.ro/download/nux/RPM-GPG-KEY-nux.ro
sudo rpm -Uvh http://li.nux.ro/download/nux/dextop/el7/x86_64/nux-dextop-release-0-5.el7.nux.noarch.rpm
  1. Finally, type in this command to install the FFmpeg and its development package:
sudo yum install ffmpeg ffmpeg-devel -y

RHEL 7/8

Follow these steps to install FFmpeg on RHEL 7/8 via the RPM Fusion repository:

  1. Open the Terminal and access via a root user.
  2. Type in the command below and press Enter to update the system:
sudo yum update
  1. Install the EPEL repository by inserting this command and hitting Enter:
sudo yum install epel-release
  1. Next, run either of these commands to install RPM fusion:

RHEL 7

yum localinstall --nogpgcheck https://download1.rpmfusion.org/free/el/rpmfusion-free-release-7.noarch.rpm https://download.rpmfusion.org/nonfree/el/rpmfusion-nonfree-release-7.noarch.rpm

RHEL 8

yum localinstall --nogpgcheck https://download1.rpmfusion.org/free/el/rpmfusion-free-release-8.noarch.rpm https://download.rpmfusion.org/nonfree/el/rpmfusion-nonfree-release-8.noarch.rpm
  1. Install FFmpeg and its development packages by typing in the following command
sudo yum install ffmpeg ffmpeg-devel -y

Fedora

Here’s how to install FFmpeg on Fedora using the RPM Fusion repository:

  1. Open the Terminal and log in as a root user.
  2. Update the system by inserting the following command:
sudo dnf update
  1. Add the RPM Fusion repository to install FFmpeg by running the command below:
sudo dnf install https://download1.rpmfusion.org/free/fedora/rpmfusion-free-release-$(rpm -E %fedora).noarch.rpm https://download.rpmfusion.org/nonfree/fedora/rpmfusion-nonfree-release-$(rpm -E %fedora).noarch.rpm
  1. Update the system once again to make sure the changes were saved by running the following command:
sudo dnf update
  1. Next, install FFmpeg and its development package by inserting this:
sudo dnf install ffmpeg ffmpeg-devel

Installing FFmpeg on Arch Linux

The official Arch Linux repository, the Packman package manager, provides the FFmpeg codex on their system. Here’s how to install it:

  1. Open the Terminal and log in to a user account with sudo privileges.
  2. Update the system packages by running the following command:
pacman -Syu
  1. Type in the command below to install FFmpeg:
sudo pacman -S ffmpeg
  1. Next, install the development package by inserting the following commands consecutively:
yay -S ffmpeg-git
yay -S ffmpeg-full-git
  1. Update the system once again by running this command:
pacman -Syu

Verifying the FFmpeg Installation

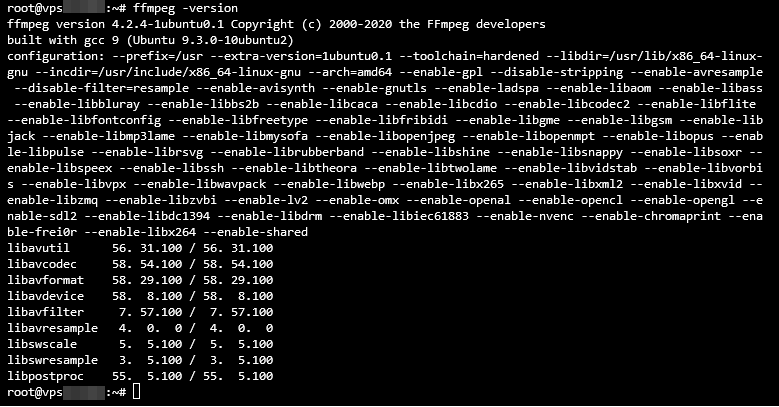
To verify the FFmpeg installation and check what version is running on the machine, insert the following command:

ffmpeg -version

The output should look as shown below:

Verifying the FFmpeg version on Linux

How to Install FFmpeg on macOS

Follow these steps to set up FFmpeg on macOS:

  1. Download the FFmpeg package from the official website.
  2. Choose the Static builds for macOS 64-bit. This will redirect you to the evermeet.cx site.
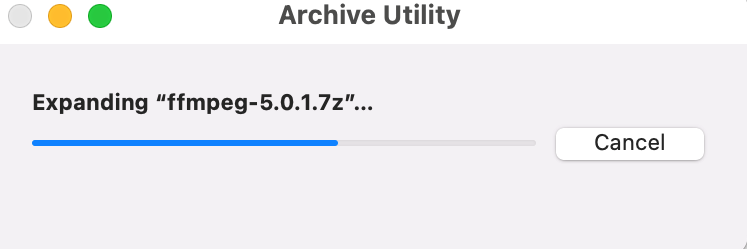
  3. Select the ffmpeg-5.0.1 version.
  4. Open the downloaded file. This will extract it using the Archive Utility and create an executable FFMpeg file.
Extracting FFmpeg using the Archive Utility tool on macOS
  1. Launch the Home folder by opening Finder and using the keyboard shortcut CMD + Shift + H, or clicking the Go button on the menu bar and clicking Home.
  2. Go to File and click the New folder. Rename it to audio-orchestrator-ffmpeg and press Return to confirm the change.
  3. Open the newly added folder and create a new folder labeled bin.
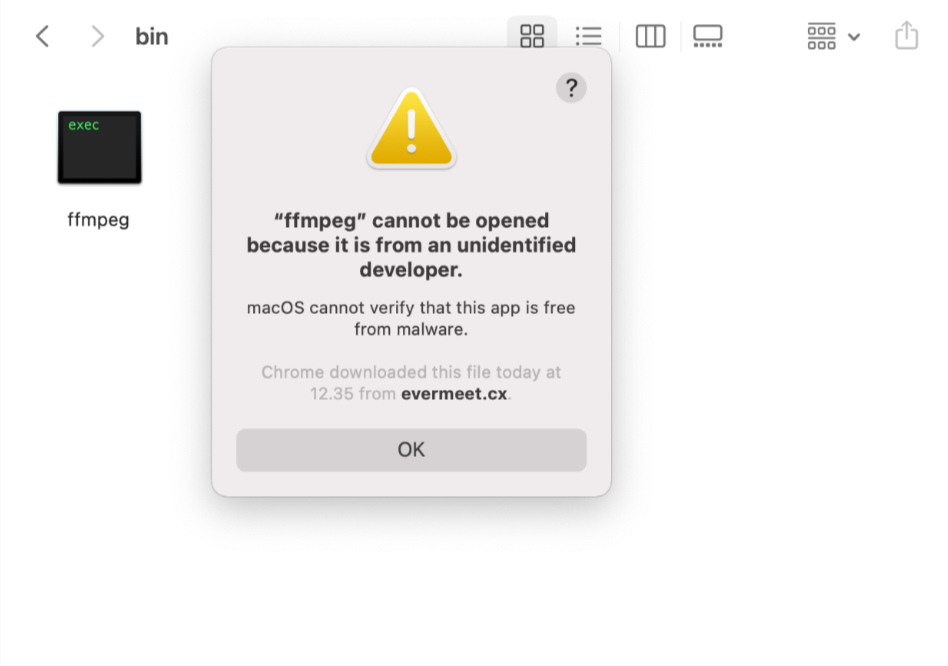
  4. Move the FFmpeg file from Downloads to the newly created bin folder.
  5. Double-click to open the FFmpeg file. When the “ffmpeg” can’t be opened because it is from an unidentified developer.” message appears, press OK.
FFmpeg error message on macOS
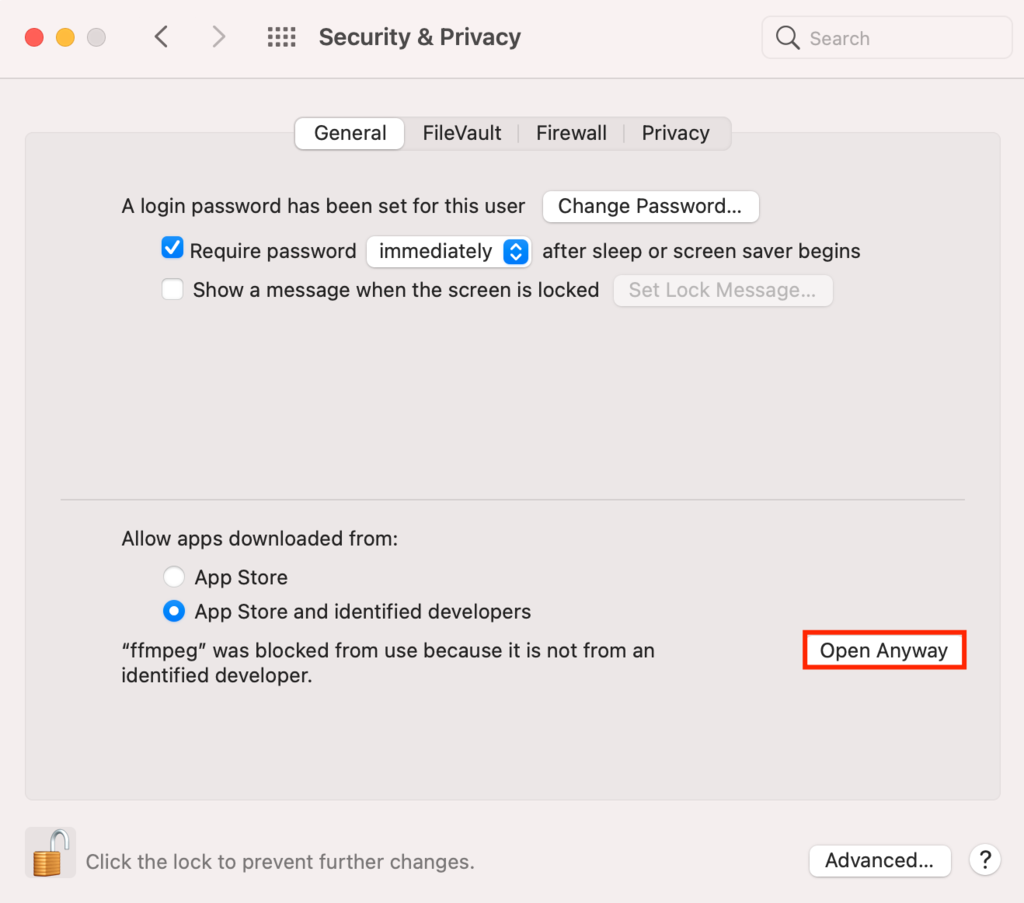
  1. Go to System Preferences and select Security and Privacy.
  2. Choose the General tab.
  3. When a new error message appears, click Open Anyway.
macOS security and privacy window
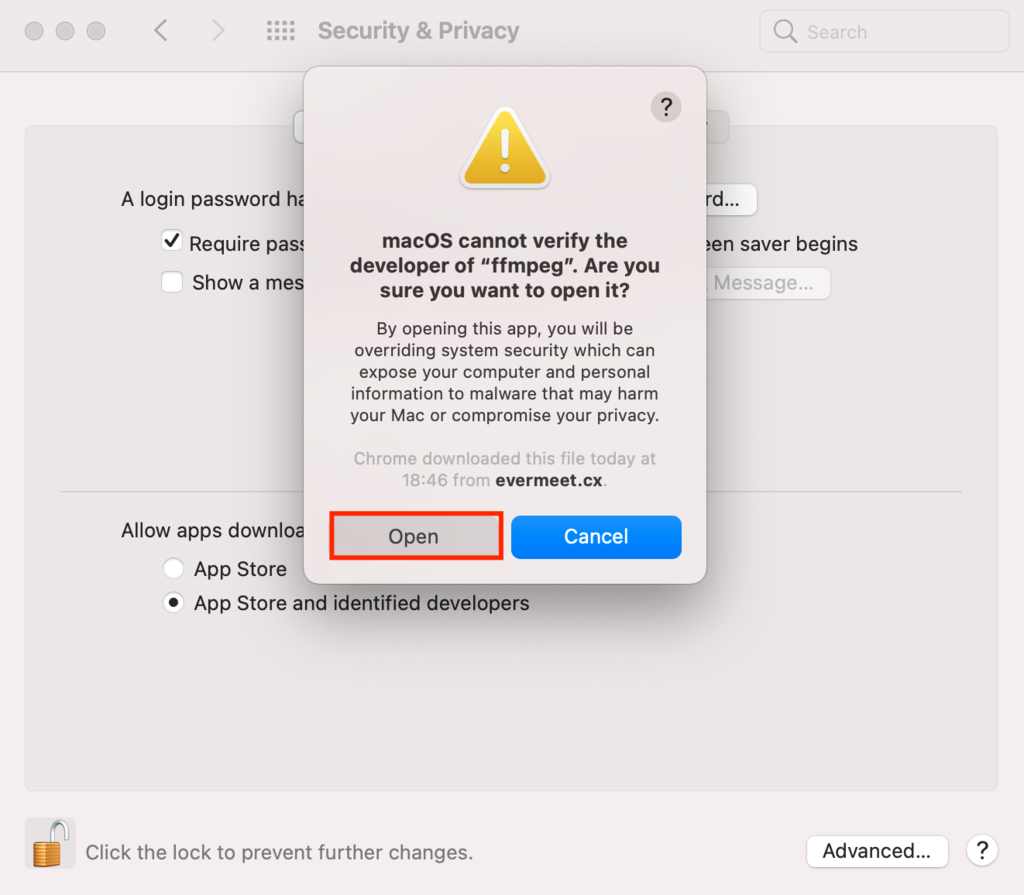
  1. Another pop-up will appear stating that “macOS cannot verify the developer of “ffmpeg”. Are you sure you want to open it?”. Click Open.
macOS security verification window
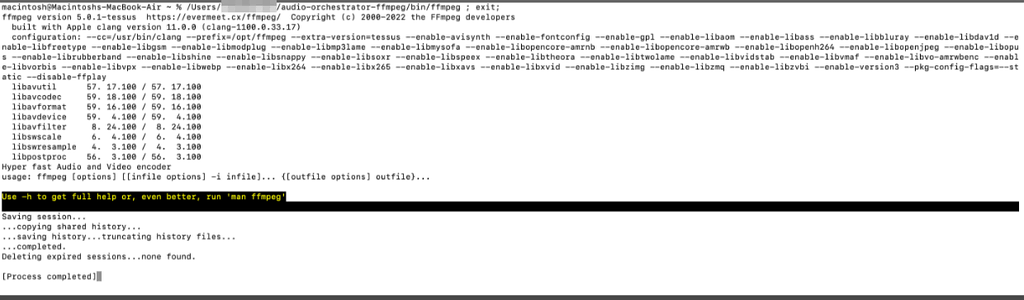
  1. Double click the FFmpeg file, and a new Terminal window will open. Close it only when the process is complete.
FFMpeg installation process on macOS
  1. Congratulations, you have successfully installed FFmpeg.

How to Install FFmpeg on Windows

Before the installation process, it is vital to have a ZIP file utility installed on your system. Here’s how to install FFmpeg on Windows:

  1. Download the FFmpeg package from the official website.
  2. Choose the Windows builds from gyan.dev. This will redirect you to the gyan.dev website.
  3. Select the ffmpeg-git-full.7z version.
  4. Once downloaded, right-click the FFmpeg folder and select Extract files.
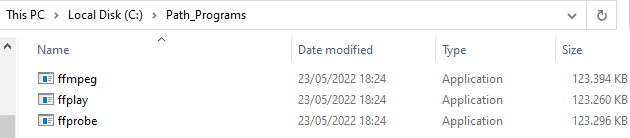
  5. Once done, open the extracted folder and copy and paste all the EXE files from bin to the root folder of your hard drive. For example, create a separate folder on the Local Disk (C:) to store all the files.
A separate folder for FFmpeg .exe files
  1. Type “environment properties” on the search tab and click Open.
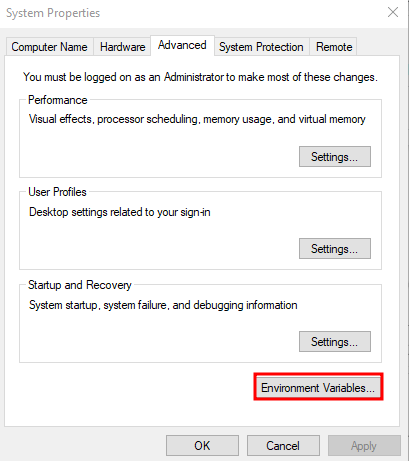
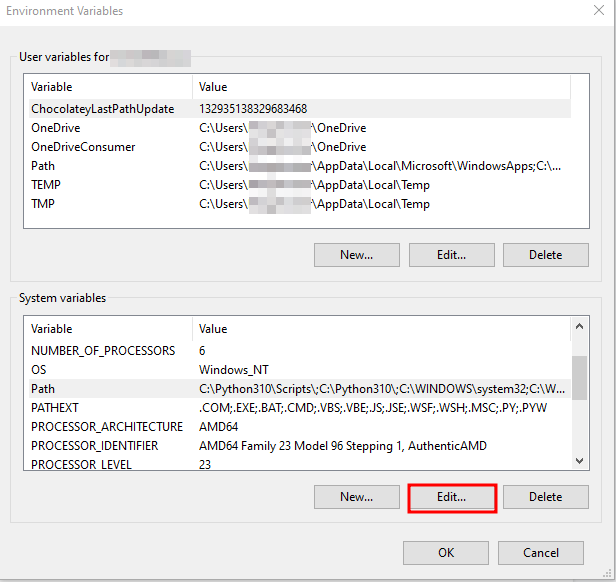
  2. This will open the System Properties window. Go to the Advanced tab and choose Environment Variables…
System properties information on Windows
  1. Go to the System variables section. Select Path from the list and click Edit.
User and system variables information on Windows
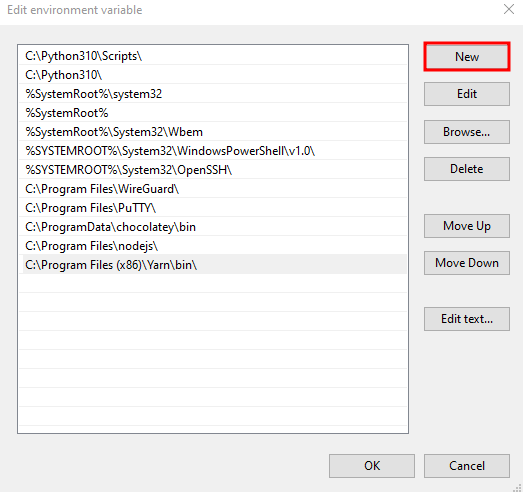
  1. Choose New and add the FFmpeg path of the folder you have created previously to store the EXE files.
Adding a new path on environment variable on Windows
  1. Once done, click OK to save your changes. This will close the Edit environment variable window.
  2. Select OK to close the Environment Variables window and click OK once again to close System Properties.
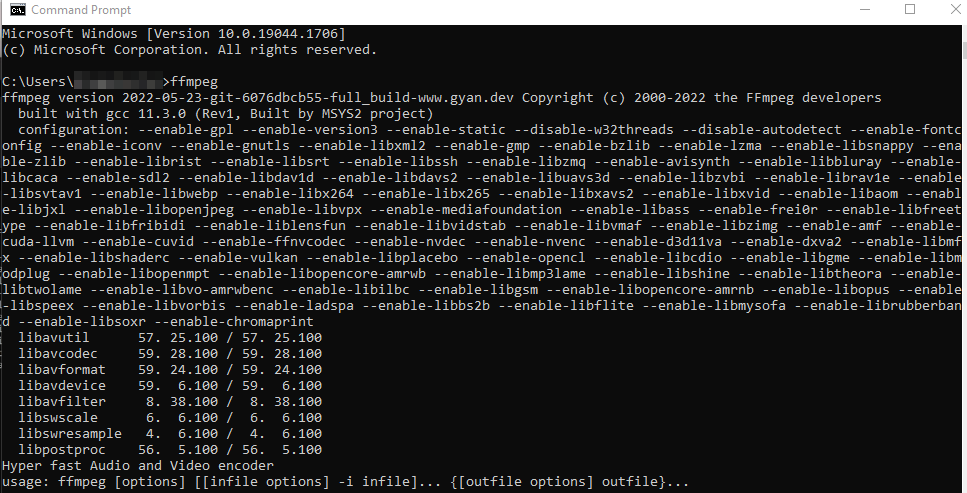
  3. Open the Command Prompt window or type “cmd” in the search tab.
  4. Run the following command to verify that FFmpeg is installed:
ffmpeg
  1. The following output should appear, showing the FFmpeg version and default configuration settings:
Checking the FFmpeg installation on Windows
  1. Congratulations, You have successfully installed the FFmpeg application on your system.